7 Innovative Steps to Build a Twitch Chat-Controlled LED Grid
There's a rich tradition of letting Twitch chat take the reins—from playing Pokémon to controlling robot arms. Now, a clever maker known as [pfeiffer3000] has extended that interactive magic to your living room lights. This project turns a livestream audience into the directors of a colorful LED grid, sparking a new level of viewer engagement. Below, we break down the essential components and steps to recreate this dazzling setup, so you can bring your own Twitch chat into the spotlight.
1. The Core Controller: ESP32
At the heart of this build lies the ESP32 microcontroller, a powerful little board that combines a dual-core processor with built-in Wi-Fi and Bluetooth. Its wireless capability is crucial for bridging the gap between your home network and the Twitch API. The ESP32 handles two main tasks: receiving chat commands via a Python script and driving the LED string accordingly. With its ample GPIO pins and robust community support, it's the perfect brain for an interactive lighting project. Its low cost and ease of programming make it accessible even for beginners looking to dip their toes into audience-controlled hardware.

2. Lighting the Way: WS2812B LEDs
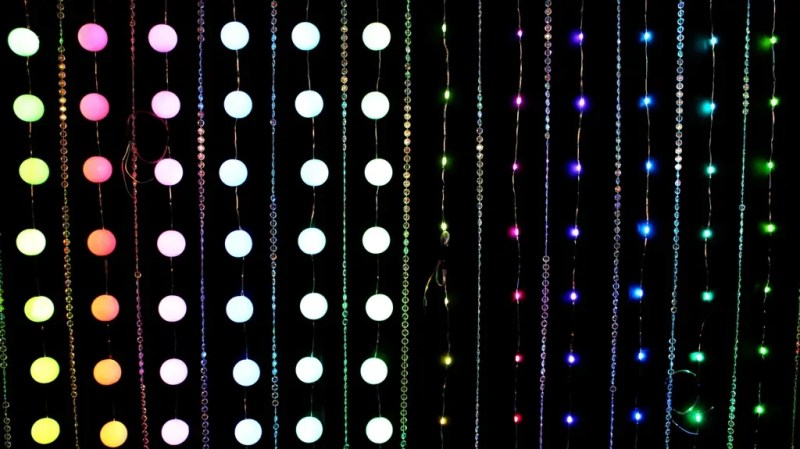
The visual output comes from a string of WS2812B addressable RGB LEDs. Each LED can be independently set to any color, allowing for animations, patterns, and real-time reactions to chat commands. To soften and spread the light evenly, [pfeiffer3000] inserted each LED into a table tennis ball, creating beautiful spherical diffusers. This simple trick transforms harsh points of light into smooth, glowing orbs that fill the room with ambient color. The combination of addressable control and clever diffusion turns a basic LED strip into a canvas for viewer creativity.
3. Building the Frame: PVC Pipe Structure
The diffused LEDs are mounted in a square frame made of PVC pipes, providing both structural support and a clean aesthetic. PVC is lightweight, inexpensive, and easy to cut, making it ideal for prototyping. The frame holds the ping-pong-ball diffusers in a grid pattern, ensuring even spacing and a professional look. This approach also allows for easy modification—you could scale the grid up or down, change the shape, or add more rows. The frame becomes the physical stage where your Twitch chat's choices come to life.
4. Software Stack: WLED Library
Driving the WS2812B LEDs efficiently is accomplished with the WLED library, a popular open‑source firmware for ESP32/ESP8266 boards. WLED offers a vast range of effects, color palettes, and real‑time control, all accessible via a web interface or API. In this project, the Python script that listens to Twitch chat sends commands directly to the WLED API, telling it which color to display, what pattern to run, or how fast to animate. This modular approach separates the chat logic from the LED control, making the system easier to debug and expand.
5. Chat Integration: TwitchIO
To bridge the gap between your livestream and the LEDs, the project uses TwitchIO, a robust Python library for interacting with Twitch's chat system. With just a few lines of code, you can set up a bot that listens for specific commands, such as !red or !rainbow, and then triggers the corresponding LED action. TwitchIO handles authentication, channel joining, and message parsing, letting you focus on the creative part. This integration is what makes the experience truly interactive—every viewer can instantly influence the visual display by typing in chat.
6. Assembly and Setup: Bringing It All Together
Once the hardware is assembled (ESP32 wired to the LED string, LEDs inserted into ping‑pong balls, frame constructed), the setup involves flashing the ESP32 with WLED firmware and running a Python script on your computer or a Raspberry Pi that connects to the Twitch API. The Python script uses TwitchIO to listen for chat messages and then makes HTTP requests to the ESP32's WLED web server. It's a surprisingly straightforward chain: chat message → Python bot → WLED API → LED change. With good documentation and community examples, most makers can get this up and running in an afternoon.
7. Going Live and Interactivity
When everything is connected, you can go live on Twitch and watch your chat become the lighting director. Viewers can type commands to change colors, start strobe effects, trigger wave patterns, or even set the grid to display pixel art. The low latency of the ESP32 and WLED means responses feel instantaneous, keeping the audience engaged. This project is a fantastic way to reward loyal viewers and turn passive watching into an active, shared experience. As [pfeiffer3000] demonstrates, the limits are only your imagination—and your chat's creativity.
Building your own audience‑controlled LED display is a rewarding journey that blends hardware hacking, software integration, and community fun. The combination of an ESP32, WS2812B LEDs, PVC frame, WLED firmware, and TwitchIO makes it accessible for makers of all levels. Whether you're a seasoned streamer looking for new interactivity or a hobbyist wanting to explore IoT, this project is a surefire hit. Start gathering your components, and get ready to hand the reins to your chat.